$ flutter create hello_world2
....
All done!
You can find general documentation for Flutter at: https://docs.flutter.dev/
Detailed API documentation is available at: https://api.flutter.dev/
If you prefer video documentation, consider: https://www.youtube.com/c/flutterdev
In order to run your application, type:
$ cd hello_world2
$ flutter run
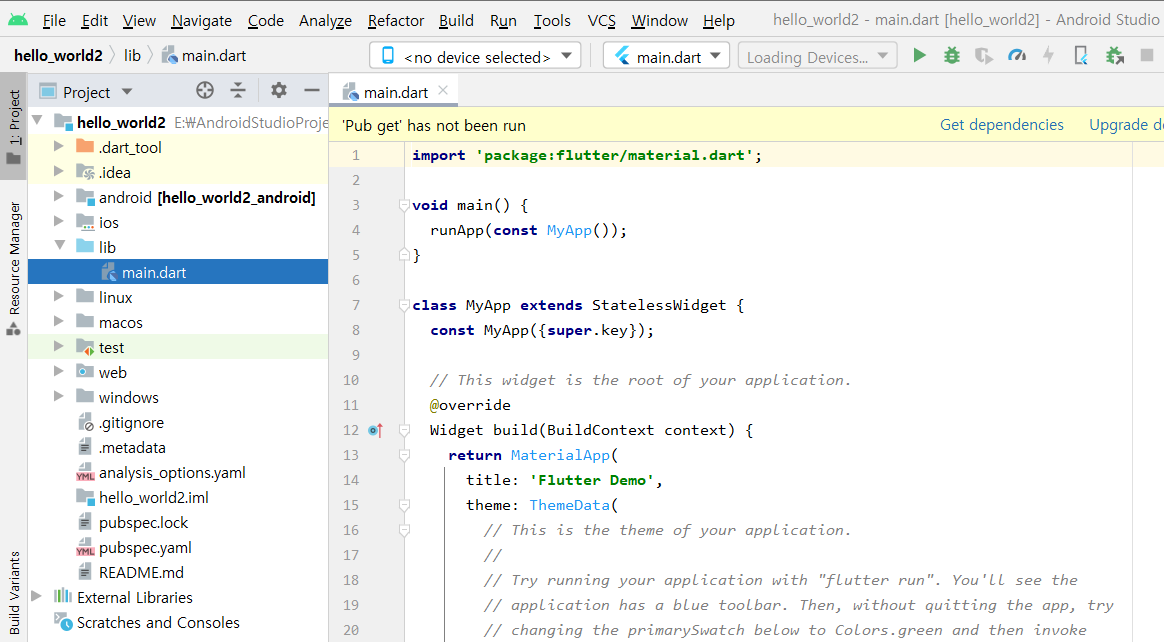
Your application code is in hello_world2\lib\main.dart.
Flutter는 고성능, 고품질의 iOS, Android, 웹(tech preview) 앱을 단일 코드 베이스로 개발할 수 있는 모바일 앱 SDK입니다.
스크롤 동작, 글씨, 아이콘과 같이 플랫폼 별로 달라지는 부분들을 아울러서 서로 다른 플랫폼에서도 자연스럽게 동작하는 고성능의 앱을 개발할 수 있게 하는 것이 Flutter의 목표입니다.
Flutter의 장점 ● 높은 생산성 ○ 단일 코드베이스로 iOS와 Android 개발할 수 있습니다. ○ 모던하고 표현적인 언어 그리고 선언적 접근법을 통해 단일 OS에서 더 적은 코드로 더 많은 것을 할 수 있습니다. ○쉽게 프로토타입을 제작하고 반복할 수 있습니다. √ 앱 실행 중에 코드를 바꾸고 리로드하여 개발을 할 수 있습니다. ( hot reload) √ 앱이 중단된 지점에서 문제를 수정하고 디버깅을 이어나갈 수 있습니다.
●아름답고, 고도로 커스터마이징된 UX를 만들 수 있습니다. ○Flutter의 자체 프레임워크를 사용하여 머티리얼 디자인과 쿠퍼티노 (iOS) 스타일의 풍부한 위젯들을 만들 수 있습니다. ○OEM 위젯의 제한없이 맞춤형의 아름다운 브랜드 주도 디자인을 실현할 수 있습니다.
핵심 원리
Flutter는 현대적인 react-style 프레임워크, 2D 렌더링 엔진, 바로 이용 가능한 위젯들, 그리고 개발 툴들을 포함합니다.
이러한 구성 요소들을 통해 앱을 디자인, 개발, 테스트 그리고 디버깅할 수 있습니다. 모든 것은 몇가지 핵심 원리들을 중심으로 구성됩니다.
모든 것은 위젯입니다
위젯은 Flutter 앱 UI의 기본 단위입니다. 모든 위젯은 UI의 불변 선언입니다.
뷰, 뷰 컨트롤러, 레이아웃 그리고 기타 다른 속성들을 분리하는 다른 프레임워크들과 다르게, Flutter는 일관적이고 통일된 오브젝트 모델을 갖고 있는데, 그것이 바로 위젯입니다.
위젯은 다음의 것들을 정의할 수 있습니다:
● 구조적인 요소 (예: 버튼이나 메뉴)
● 스타일적인 요소 (예: 폰트나 색상)
● 레이아웃 요소 (예: 패딩)
● 기타 등등…
위젯은 구성을 기반으로 계층 구조를 형성합니다.
각 위젯은 내부에 중첩되고 부모의 속성들을 상속받습니다.
별도 “application” 오브젝트가 없는 대신 최상위 위젯이 그 역할을 하게 됩니다.
프레임워크에게 위젯을 계층 구조 상 다른 위젯으로 교체하게 함으로써, 사용자 상호작용과 같은 이벤트를 구현할 수 있습니다. 프레임워크는 새로운 위젯과 기존 위젯을 비교하고 효을적으로 UI를 업데이트하게 됩니다.
구성 > 상속
위젯은 종종 강력한 효과를 내기 위해 단일 목적의 여러 작은 위젯들로 구성됩니다.
예를 들어, 일반적으로 사용되는 Container 위젯은 painting, positioning, sizing과 같은 레이아웃 관련 위젯들로 구성됩니다.
// class 정의.
class Person {

	// class 종속 변수
	String name = '이름';

    // class 종속 함수 = 메소드
    // 내부 속성을 사용할 때 this 키워드 사용.
    void sayName() {
    	print('My name is ${this.name}');
    }

}
인스턴스 생성
void main() {
	// 인스턴스 생성
	Person person = Person();

    // 메소드 실행.
    person.sayName();
}
생성자
class Person {
	// 생성자에서 입력 받는 변수들은 일반적으로 final 키워드 사용.
	final String name;

    // 생성자 선언. class 와 같은 이름.
    // 매개변수 지정
    Person(String name) : this.name = name;

    // this 를 사용할 경우.
    // 해당되는 변수에 자동을 매개변수가 저장.
    Person(this.name);

    void sayName() {
    	print('My name is ${this.name}');
    }

}

void main() {
	Persion person = Person('홍길동');
}
네임드 생성자
class Person {
	final String name;
    final int age;

    // 1개 이상의 변수를 저장할때는 , 기호로 연결.
    Person(String name, int age)
    	: this.name = name,
          this.age = age;

    // 네임드 생성자
    Person.fromMap(Map<String, dynamic> map)
    	: this.name = map['name'],
          this.age = map['age'];

    void sayName() {
    	print('My name is ${this.name}');
    }

}

void main() {
	Persion person = Person('홍길동', 20);
    Persion hong = Person.fromMap({
    	'name' : '홍길동',
        'age' : 20,
    });
}
private 변수
class Person {
	// '_' 로 시작하면 private 변수 선언.
	String _name;

    Person(this._name);

    void sayName() {
    	print('My name is ${this._name}');
    }

}

void main() {
	Persion person = Person('홍길동');
    print(person._name); // 같은 파일에서는 에러가 발생하지 않지만 다른 파일에서 사용시 에러 발생.
}
Getter / Setter
class Person {
	String _name = 'hong';

    // get 키워드를 사용하여 getter 명시
    // 매개변수를 받지 않음.
    String get name {
    	return this._name;
    }

    // set 키워드를 사용하여 setter 명시
    // 매개변수로 하나의 변수를 받음.
    set name(String name) {
    	this._name = name;
    }

}

void main() {
	Persion person = Person();
    person.name = '홍길동'; // setter
    print(person.name); // getter
}
상속
class Person {
	final String name;

    Person(this.name);

    void sayName() {
    	print('My name is ${name}.');
    }
}

// 상속
class Man extends Person {
	// 상속 받은 생성자
    // super 는 부모 클래스를 의미한다.
	Man(String name) : super(name);

    void sayMan() {
    	print('I am a man');
    }
}

void main() {
	Man man = Man('홍길동');
	print(man.sayName()); // 부모한테 물려받은 메소드
    print(man.sayMan()); // 자식이 추가한 메소드
}
오버라이드
class Person {
	final String name;

    Person(this.name);

    void sayName() {
    	print('My name is ${name}.');
    }
}

class Girl extends Person {
    // super 키워드를 직접 사용할 수 있음.
	Girl(super.name);

    @override
    void sayName() {
    	print('My name is ${name} and I am a girl');
    }
}

void main() {
	Girl girl = Girl('영희');
	print(girl.sayName()); // override 된 메소드
}
인터페이스
// implements 키워드를 사용하면 클래스를 인터페이스로 사용할 수 있다.
class Girl implements Person {
    final String name;

	Girl(super.name);

    // 인터페이스로 사용할 때는 모든 메소드를 재정의 해야한다.
    void sayName() {
    	print('My name is ${name}');
    }
}

void main() {
	Girl girl = Girl('영희');
	print(girl.sayName());
}
믹스인???
- 이건 잘 모르겠다... --;;;
추상 클래스
- 인스턴스화 할 필요가 없을 경우에 사용
// abstract 키워드를 사용하여 추상 클래스 정의.
abstract class Person {
	final String name;

    // 생성자 선언
    Person(this.name);

    // 추상 메소드 선언.
    void sayName();
}

// implements 키워드를 사용하여 추상 클래스를 구현.
// 생성자를 비롯하여 모든 메소드를 정의해야 한다.
class Girl implements Person {
	final String name;

    // super 키워드를 직접 사용할 수 있음.
	Girl(this.name);

    void sayName() {
    	print('My name is ${name} and I am a girl');
    }
}

void main() {
	Girl girl = Girl('영희');
    print(girl.sayName());
}
제너릭
// 제너릭
// 특정 변수의 타입을 제한하고 싶지 않을 때 사용.
// 인스턴스화 할 때 입력받을 타입을 T 로 지정.
class Generate<T> {
	// 데이터 타입을 인스턴스화 할 때 지정한 타입으로 사용.
	final T data;

    Generate({
    	required this.data,
    });
}

void main() {
	// 제너릭에 입력된 값을 통해 data 변수의 타입이 자동으로 유추.
	final gen = Generate<List<int>> (data : [1, 2, 3]);
    print(gen.data.reduce((v,e) => v + e); // 6
}
static
class Count {
	// static 은 클래스 자체에 귀속
	static int i = 0;

    // 생성자가 호출될때 마다 i 증가.
    Count() {
    	i++;
        print(i);
    }
}

void main() {
	Count c1 = Count(); // 1
    Count c2 = Count(); // 2
    Count c3 = Count(); // 3
}
Cascade
class Person {
	final String name;
    final int age;

    Person(this.name, this.age);

    void sayName() {
    	print('My name is ${this.name}');
    }

    void sayAge() {
    	print('My age is ${this.age}');
    }
}

void main() {
	// cascade 연산자 ..
    // 인스턴스의 속성이나 메소드를 연속해서 사용하는 것.
	Person person = Person('홍길동', 20)
    	..sayName()
        ..sayAge();
}
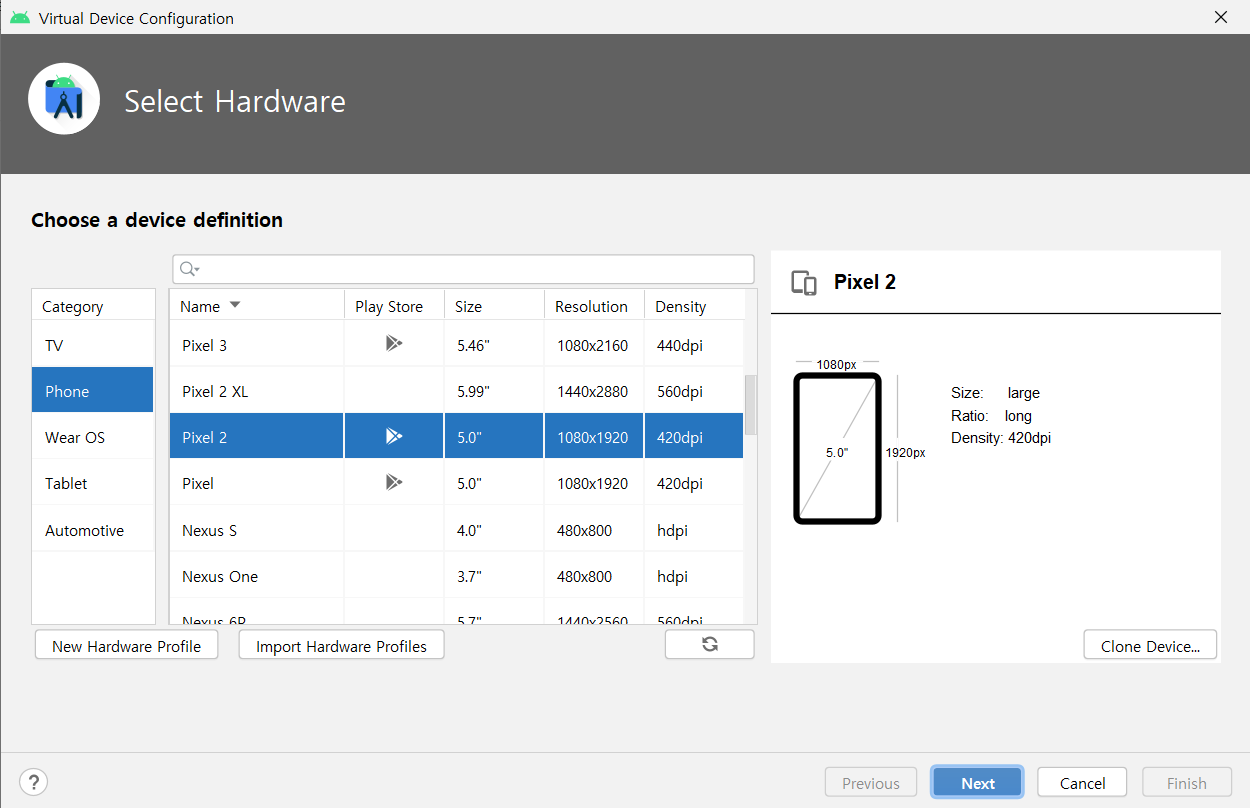
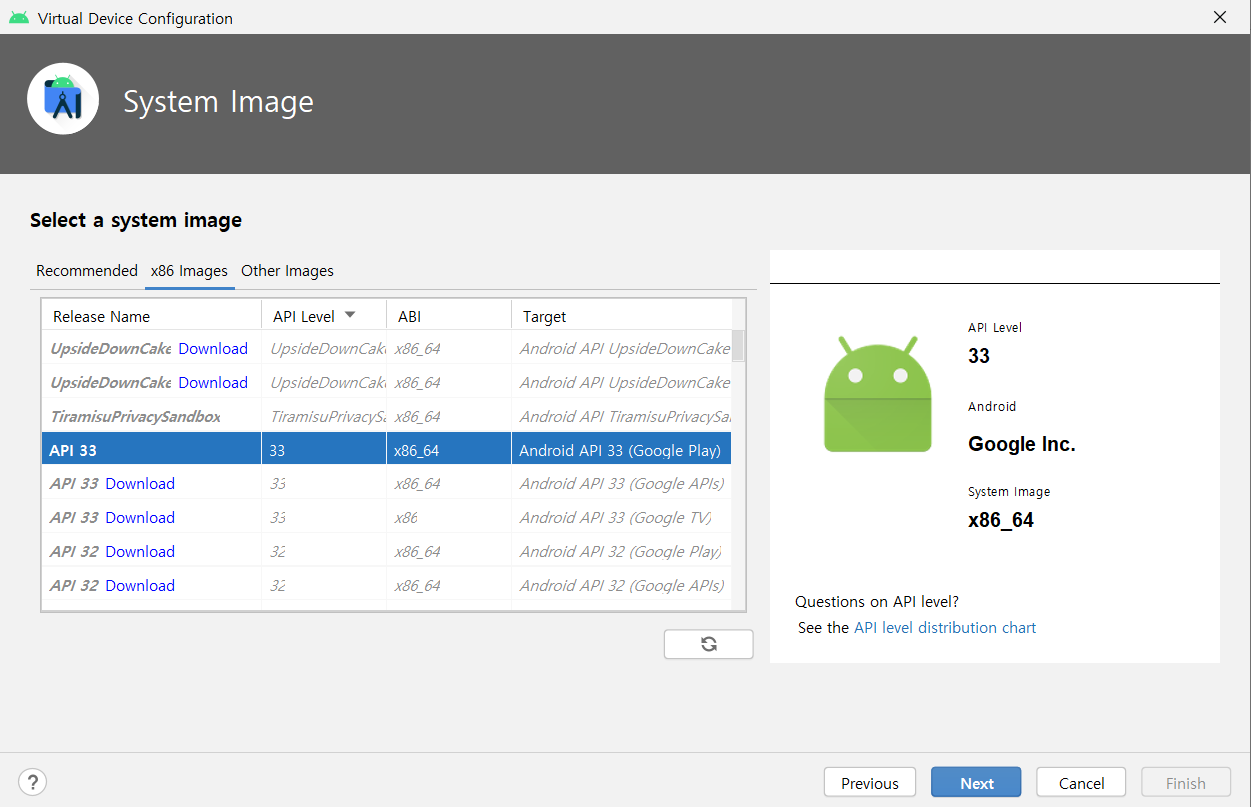
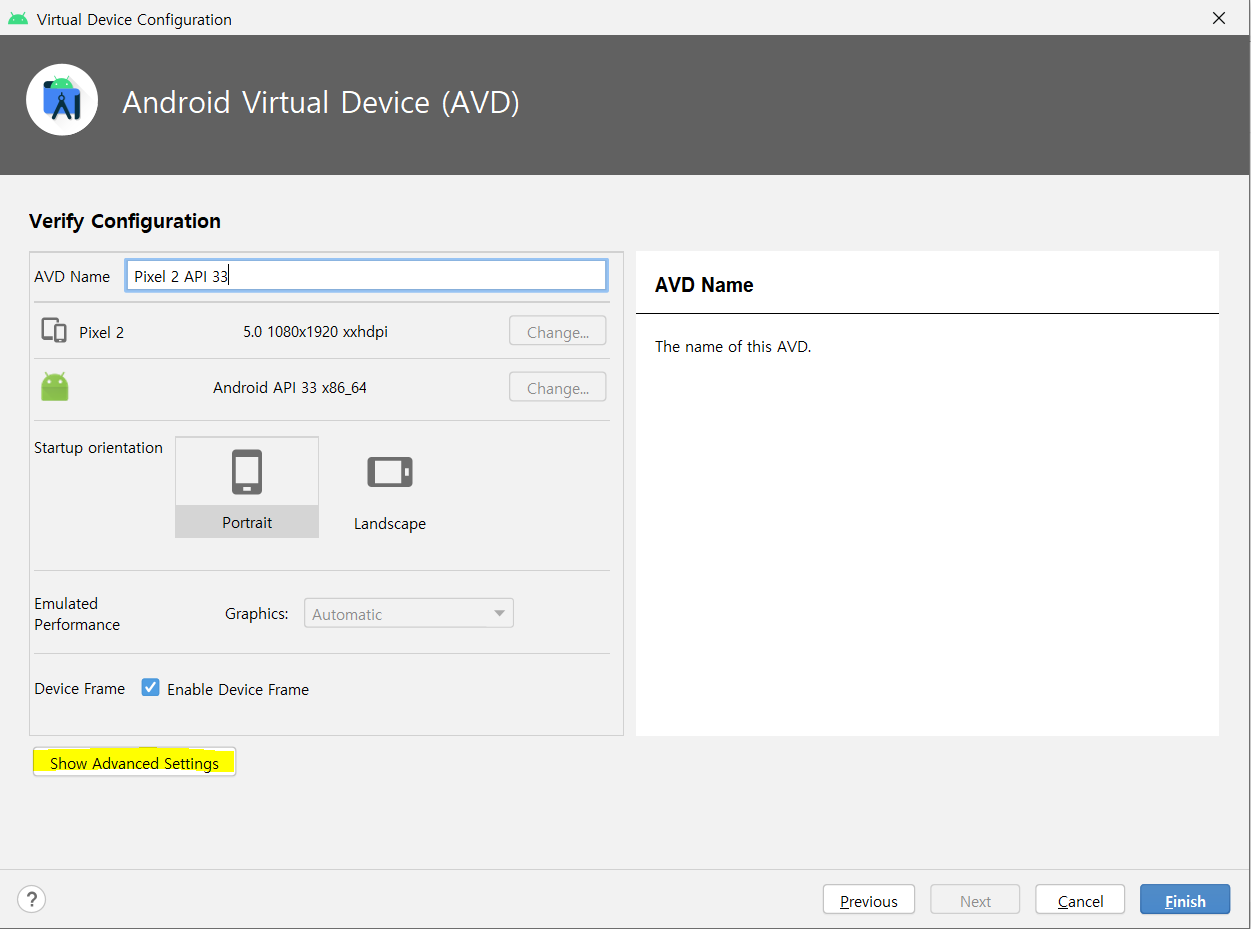
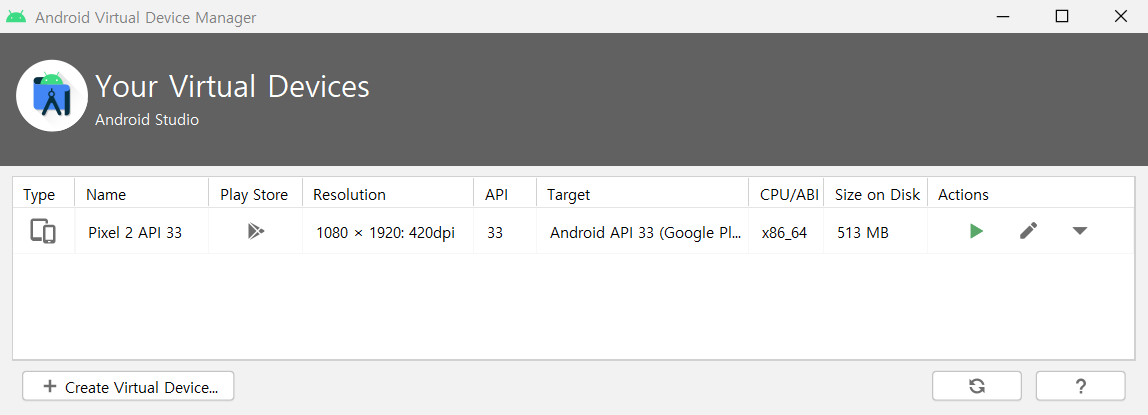
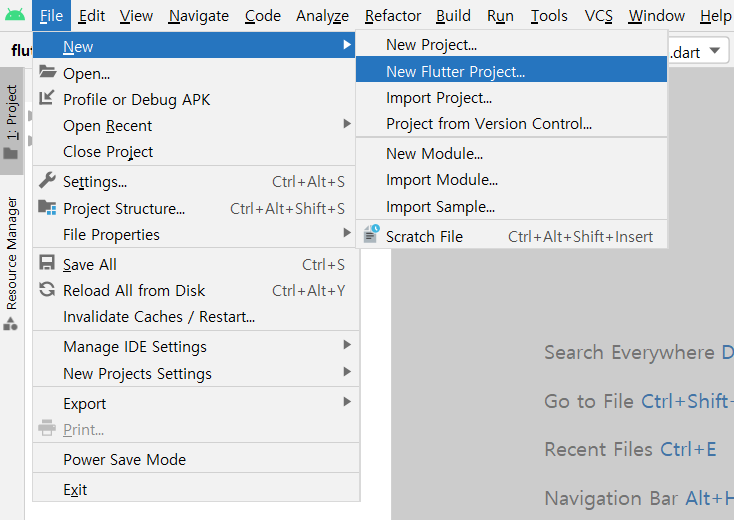
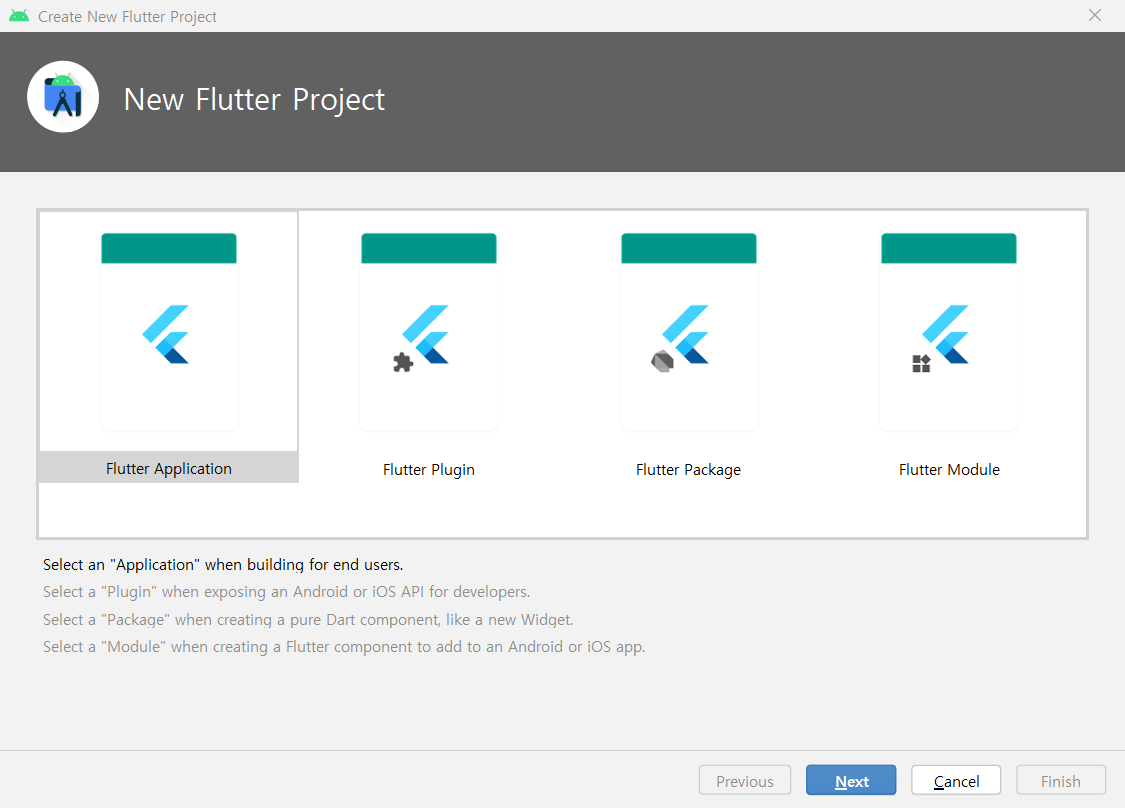
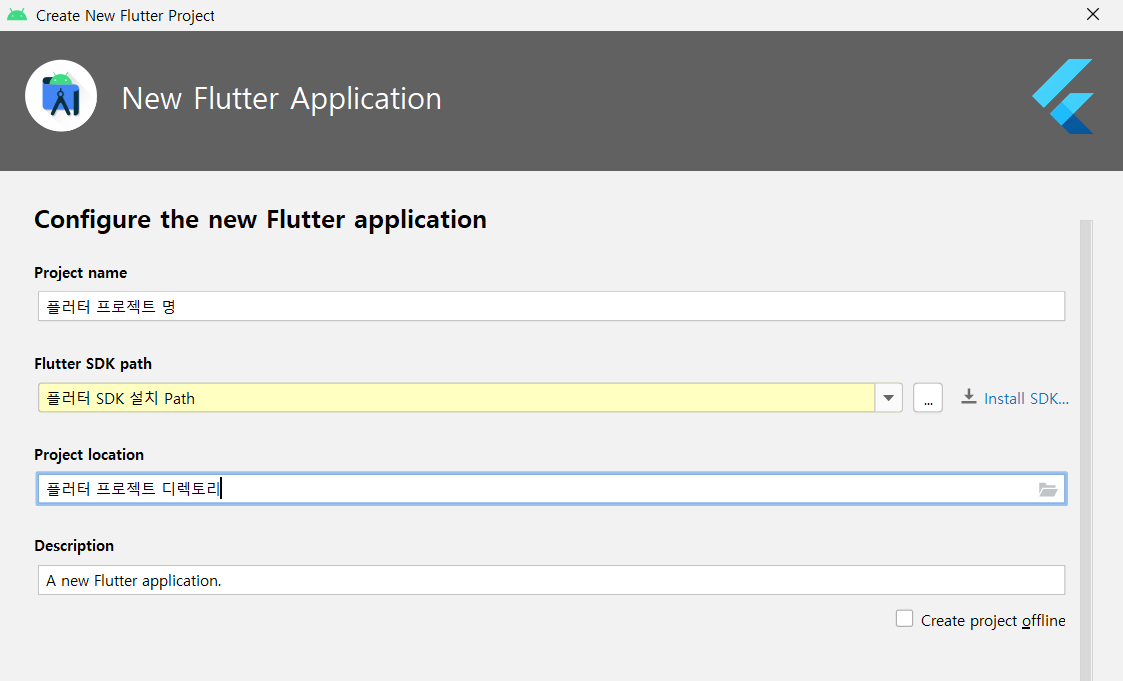
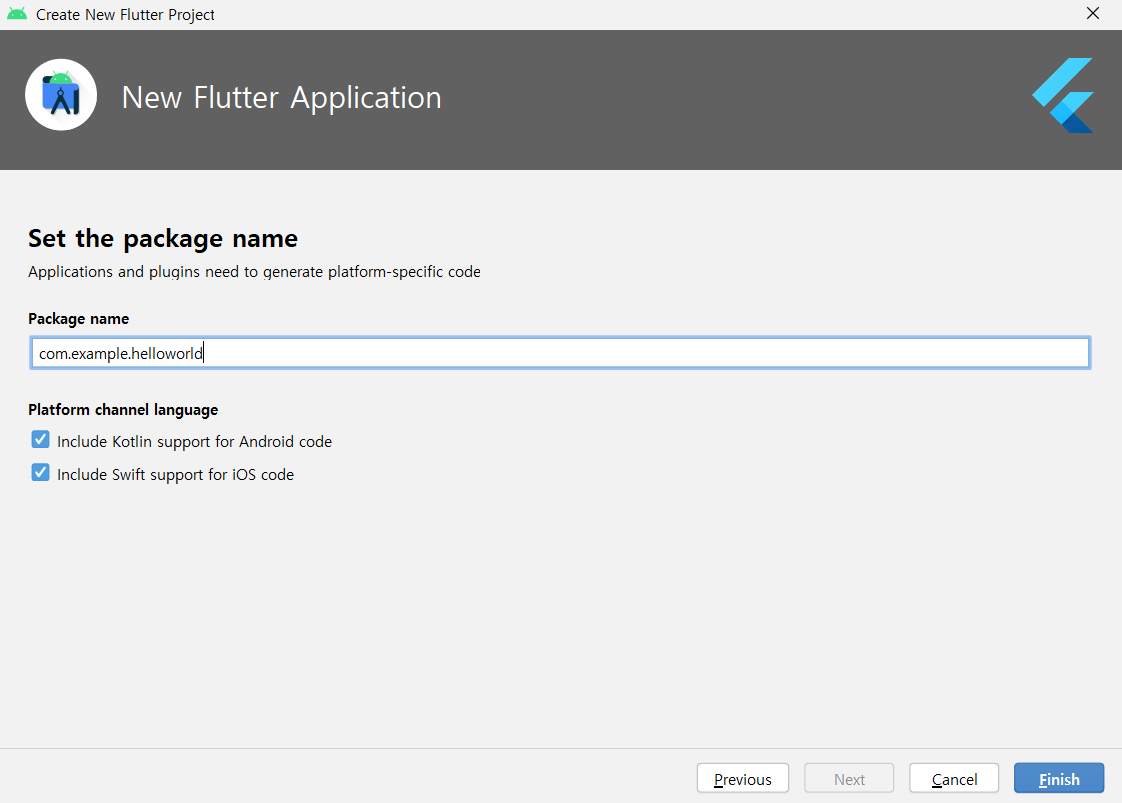
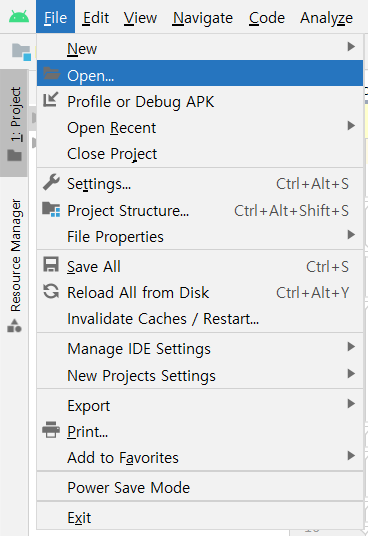
File -> New -> New Flutter Project ... 메뉴를 클릭하여 플러터 프로젝트를 생성한다.
lib/main.dart 파일에 코드를 작성 후 안드로이드 스튜디오 하단의 터미널 탭에서 dart lib/main.dart 명령어를 실행한다.
기초 문법
메인 함수
void main() {
	// 한줄 주석

    /* 시작기호, 끝 기호 */
    /* 여러 줄 주석
    *
    *
    * */

    /// 슬래시 세 개를 사용하면 문서 주석을 작성할 수 있습니다.

}
변수 선언
// 변수 타입
String(문자열), int(정수형), double(실수형), bool(불리언 true/false)
String s = '';
int i = 1;
double d = 1.0;
bool b = true;

// 자동으로 타입을 추론. 한번 추론된 타입은 고정됨.
var name = '이름';

// 추후에 타입이 바뀌면 에러
name = 1; // 에러

// dynamic 키워드를 사용하면 변수 타입을 고정하지 않고 사용 가능.
dynamic d_name = '다이내믹';
d_name = 1;

// final, const 는 처음 선언 후 값 변경이 불가하다.
final String f_str = 'final string';
f_str = 'new string'; // 에러 발생

const String c_str = 'const string';
c_str = 'new const'; // 에러 발생

// final 은 런타임, const 는 빌드타임 상수이다.
// DateTime.now() 는 실행되는 순간(런타임 시) 값이 정해진다.
final DateTime f_now = DateTime.now();
const DateTime c_now = DateTime.now(); // 에러 발생

// 컬렉션
// List
List<String> list = ['s1', 's2', 's3'];
print(list[3]); // s3
list.add('s4');
final list_where = list.where((str) => str == 's1' || str == 's4'); // Iterable (s1, s4)
print(list_where.toList()); // [s1, s4]
final list_map = list.map((str) => 'new $str'); // Iterable (new s1, new s2, new s3, new s4);
final list_reduce = list.reduce((v, e) => v + ', ' + e); // (반환 타입이 String) s1, s2, s3, s4
final list_fold = list.fold(0, (v, e) => v + e.length); // (반환 타입 아무거나 가능) 8

// Map
Map<String, String> map = {
	'a' : 'a1',
    'b' : 'b2',
    'c' : 'c3',
};
print(map['b']); // b2
print(map.keys); // Iterable (a, b, c)
print(map.values); // Iterable (a1, b2, c3)

// Set
Set set = {'s1', 's2', 's3'};
set.contain('s2'); // true
set.toList(); // Set to List
Set.from(list); // Set from List

// enum
enum Status {
	ready,
    play,
    done,
}

Status status = Status.ready;
print(status); // Status.ready
연산자
// 사칙연산
+
-
*
/ // 몫
% // 나머지
++
--
+=
-=
*=
/=


// null 관련 연산자
// nallable
double? number1 = 1;

// not null
double number2 = null; // 에러 발생

// null 로 초기화
double? number;

// null 이면 할당.
number ??= 3; // 3

// not null 이면 할당하지 않음.
number ??= 4; // 3


// 값 비교
>
<
>=
<=
==
!=


// 타입 비교
print(number is int); // false
print(number is double); // true
print(number is! int); // true
print(number is! double); // false


// 논리 연산자
&&
||
제어문
if
else if
else

switch() {
	case 1 :
    	print();
    	break;
    default:
    	print();
}

for(int i=0; i < 10; i++) {
	print(i);
}

List<int> list = [1,2,3];
for(int n in list) {
	print(n);
}

while() {
}

do {
} while()
함수와 typedef
void main() {
	// 고정된 매개변수(포지셔널 파라미터)
      print(addTwoNumbers1(2, 3));

      // 이름이 있는 매개변수(네임드 파라미터)
      print(addTwoNumbers2(a:2, b:3));

      // 고정된 매개변수 기본값 지정
      print(addTwoNumbers3(2));
      print(addTwoNumbers3(2, 1));

      // 이름이 있는 매개변수 기본값 지정
      print(addTwoNumbers4(a:2));
      print(addTwoNumbers4(a:2, b:1));


      // typedef 는 일반적인 변수의 type 처럼 사용.
      Operation oper = add;
      oper(1, 2);

      oper = subtract;
      subtract(5, 2);

      calculate(3, 4, add);
}

// 함수의 시그니처 정의.
typedef Operation = void Function(int x, int y);

void add(int x, int y) {
  print('Add Result = ${x + y}');
}

void subtract(int x, int y) {
  print('Subtract Result = ${x - y}');
}

// dart 에서 함수는 일급 객체(일급 시민)이므로 함수를 값처럼 사용 가능.
// typedef 으로 선언한 함수를 매개변수로 사용 가능.
void calculate(int x, int y, Operation oper) {
  oper(x, y);
}

int addTwoNumbers1(int a, int b) {
  return a + b;
}

int addTwoNumbers2({required int a, required int b}) {
  return a + b;
}

int addTwoNumbers3(int a, [int b=3]) {
  return a + b;
}

int addTwoNumbers4({required int a, int b=3}) {
  return a + b;
}
# spring.config.location(기본값 : classpath:/,classpath:/config/,file:./,file:./config/) # - 나중에 기술된 위치가 우선 순위가 높음. # - 디렉토리 / 파일명 모두 명시 가능 # - 디렉토리를 명시 했을 경우 profile 설정 사용 가능. ex) spring.config.location=classpath:/custom-config/,file:./custom-config/ 1. file:./custom-config/ 2. classpath:custom-config/
# ############################ # # 파일명(profiile) 우선 순위 설정. # ############################ #
# spring.profiles.active 설정. # - 나중에 기술된 profile(dev) 이 우선순위가 높음. ex) spring.profiles.active=common,dev 1. application-dev.properties 2. application-common.properties 3. application.properties
# spring.profiles.include 설정. # - include 된 profile 이 우선순위가 높음. ex) application.properties 파일 내용(spring.profiles.include=common) 1. application-common.properties 2. application.properties
# spring.profiles.active & spring.profiles.include 설정. # - spring.profiles.active 의 profile 이 우선순위가 높음. ex) spring.profiles.active=dev